A Hat in Time – Blender に適切にアーマチュアをインポート/エクスポートする方法

このガイドでは、Blender を使用して A Hat in Time からアーマチュアを効果的にインポートする方法と、アーマチュアをモッドに効果的にエクスポートする方法について詳しく説明します!
Blender 用に適切にアーマチュアをインポート/エクスポートするためのガイド
はじめに
これは基本的なガイドであり、アーマチュアに関連するインポートとエクスポートのみをカバーしています。ここで取り上げられていないものは、その特定の範囲に含まれていない可能性が高いです。
インポート中:ルート ボーンがありません!
Blender には、インポート時にゲームのモデルのルート ボーンを食べるという厄介な癖があります。つまり、モデルを編集してゲームに戻すか、スケルトンで独自のモデルを使用する場合 (カスタム コスチュームやプレイ可能なキャラクターなど)、ルート ボーンをモデル!方法は次のとおりです。
モデルをブレンダーにインポートすることから始めます ([ファイル]> [インポート]> [FBX])。このガイドでは、ほとんどの人がおそらく使用するであろうモデル、Hat Kid を使用します。
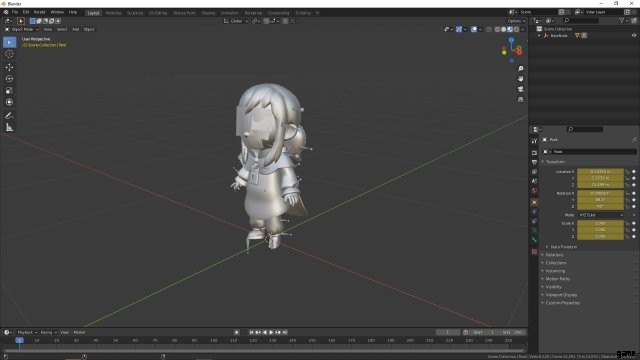
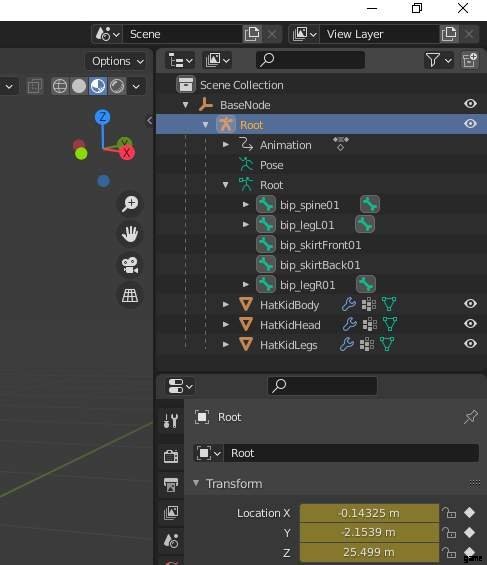
私たちが今行っていることは、ルート ボーンを再追加する必要がある場所を正確に特定することです。右上隅に移動して BaseNode 階層を開き、「Root」という名前のアーマチュアを表示します。
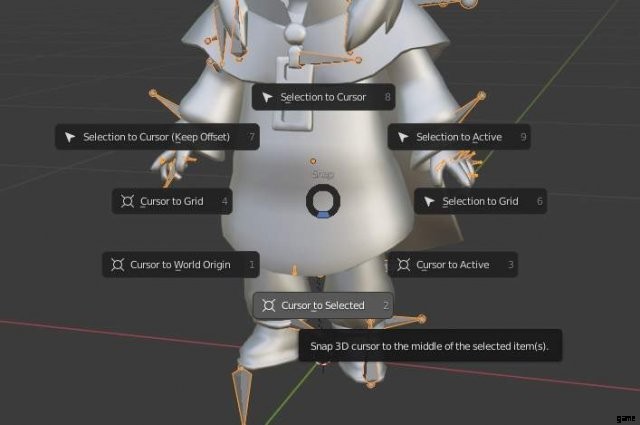
モデルのメイン ビューに戻ります。 3D カーソルをアーマチュアの正確な位置に移動します。これを行うには、Shift+S を押したまま、「選択項目へのカーソル」を選択します。
この次の部分はオプションですが、次のいくつかの手順が簡単になると思います。本体メッシュを選択して H を押して非表示にします。次に、アーマチュア「ルート」を再度選択し、編集モードに入ります。
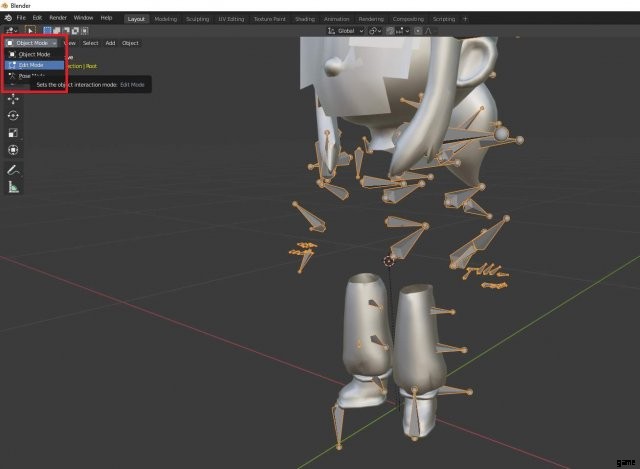
次に、新しいボーンを追加します。
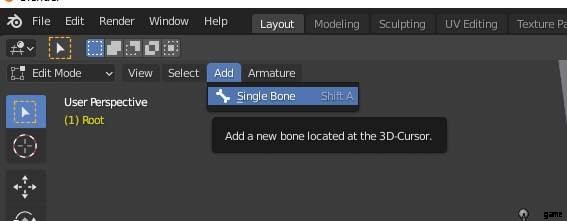
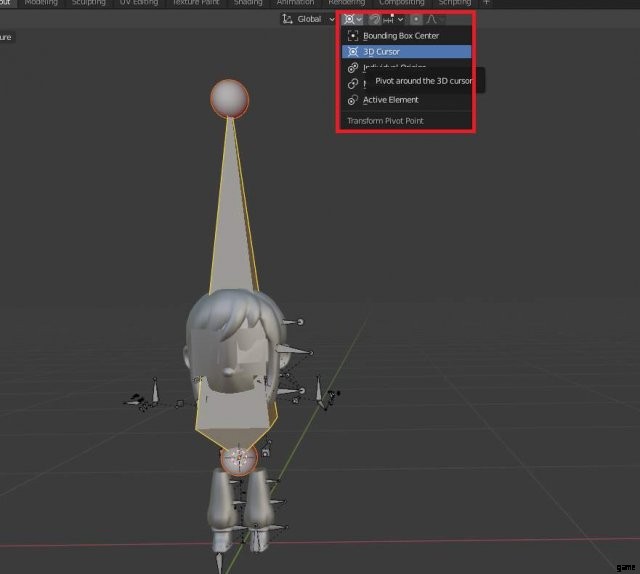
うわー、その骨は大きすぎる!次のステップに進む前に、それを縮小したい場合があります。新しいボーンを選択した状態で、Transform Pivot Point を「3D Cursor」に変更し、新しいボーンを縮小します。スケーリングのショートカットは S です。
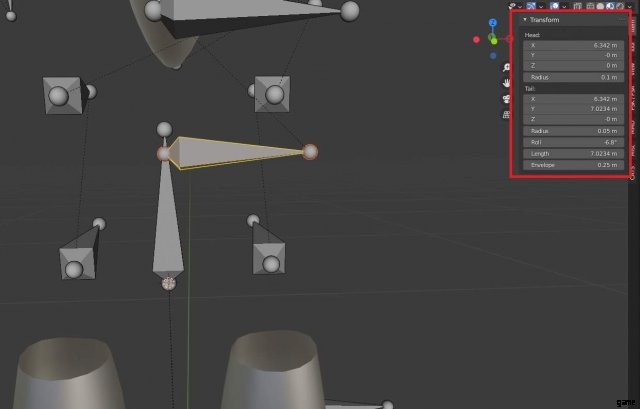
ボーンが適切なサイズになったので、残りのぎこちないアーマチュアと整列するように正しく配置します。この目的のために、脊椎ボーンの頭と尾の位置とロールをコピーすることをお勧めします。ただし、ルート位置を維持するには、新しいボーンの X 位置の値をそのままにして、背骨のボーンの Y および Z 位置の値のみをコピーします。また、これがどの程度影響するかはわかりませんが、常にボーンのロールもコピーします。この場合は -6.8 です。スクリーンショットで、この位置情報を示す便利なメニュー ポップアップを表示するには、N を押します。
さて、私たちの骨は今、美しく整っています。それはまだ「骨」と名付けられていますが、それは良くありません。右上に戻り、名前を「Root」に変更します。大文字の使用が重要であることを忘れないでください!
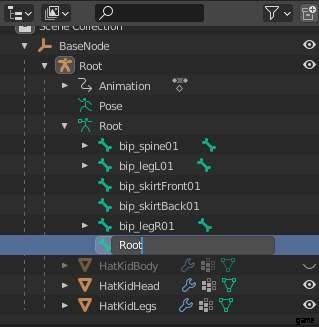
次に、物事を整理するために、骨の上に「ルート」という名前のものが 2 つ残っているため、混乱する可能性があります。それらの名前も変更するのが最善かもしれないので、一般的な「SkeletalMesh」または「Skelmesh」を使用することがあります。それらが別の名前を持っている限り、問題ありません。
Now, every other bone that is sitting at the same level as your Root bone will have to become children of your Root bone. To do this, select the bone in edit mode (preferably through selecting them in the upper right) and set the bone’s parent to “Root” from the “Bone Properties.” Do this for all of the bones that are on the same level as your Root.
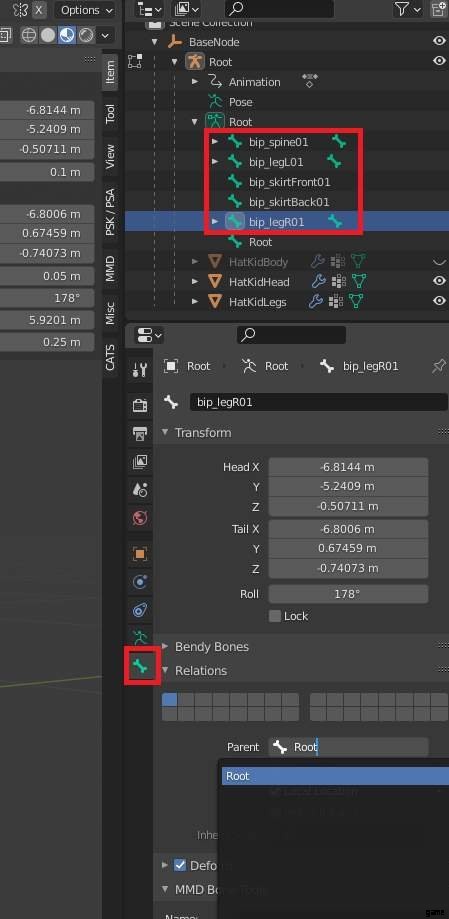
The armature has been successfully repaired! What about the model though? It is missing weight data for the Root bone! Thanks a lot Blender. No worries, we can restore the weight of the Root pretty simply.
Importing:There’s Missing Weight Data!
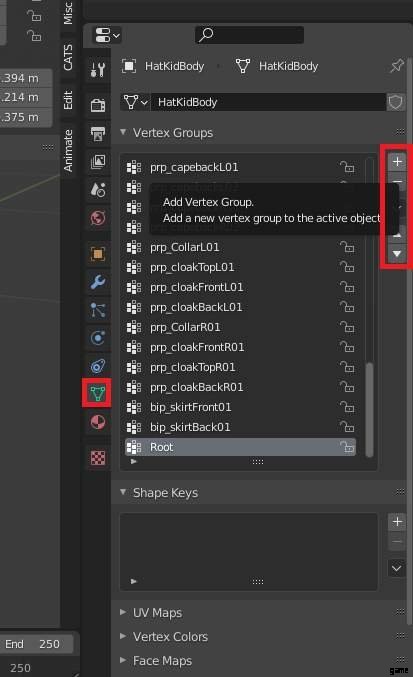
In order to restore weight data to our model, go to the bottom right with your model selected and go to the “Object Data Properties” tab. Once there, you should be greeted by the Vertex Groups in full view. Go to the right and click on the plus icon (+) to add a new vertex group. Name it “Root” to match with your new bone, and remember again that capitalization is important!
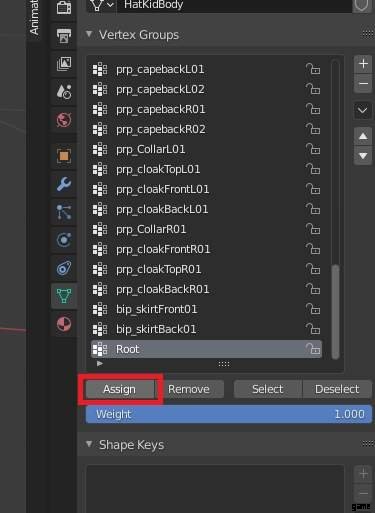
In Edit Mode, select every single vertex on the model. The shortcut for that is A. Go back to the vertex groups, and click the “Assign” button while you have the “Root” vertex group selected. For those of you who aren’t completely new to Blender, you may think I am committing a grave crime. Bear with me for a second, I promise this is for a reason.
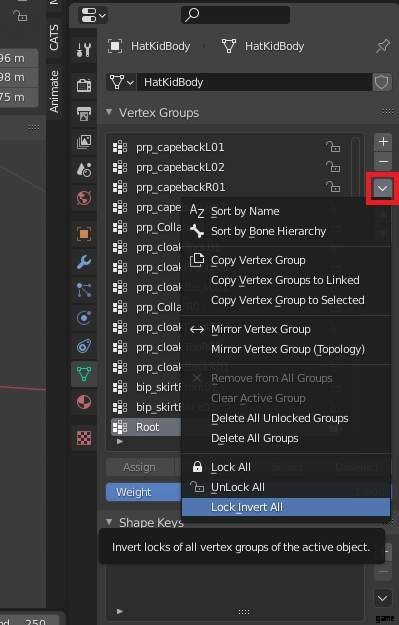
Now, click on the lock icon next to the “Root” vertex group. After you do this, go to the dropdown menu in the screenshot below and invert the locks. This will lock every single vertex group except for the Root.
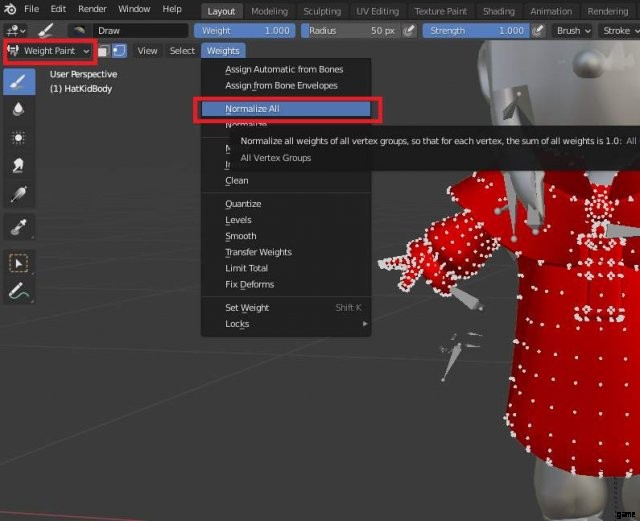
Go into Weight Paint Mode and use the “Normalize All” function (Weights>Normalize All).
If nothing happens, look in the bottom left and make sure that the “Lock Active” box is NOT ticked.
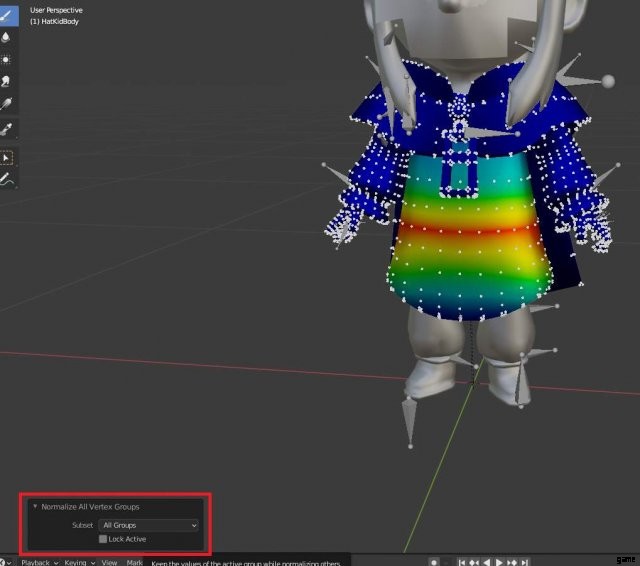
For Hat Kid’s model specifically, part of her leg model is weighted to the Root as well. Repeat all of these steps for any other models that need weight restoration. Congratulations, you have successfully restored the Root bone’s weights to the model!
Exporting:My Model is Not Animating Correctly In-Game!
I am detailing this part for the sake of convenience instead of simply putting a link.
For some odd reason, Blender likes to add a new root bone when you export to FBX. The Modding Tools don’t like that sort of thing, so your models will not animate correctly unless you prevent Blender from doing this. Locate Blender’s FBX export python script by navigating to
- C:Program FilesBlender FoundationBlender”Version”scriptsaddonsio_scene_fbxexport_fbx_bin.py
This is a protected file, so you need administrator permissions to edit it. Open any text editor of your choosing (like Notepad) in Administrator mode. Once you have the specified file open in your text editor in Admin mode, find the following lines:
elif ob_obj.type ==‘EMPTY’ or ob_obj.type ==‘ARMATURE’:
empty_key =data_empties[ob_obj]
connections.append((b”OO”, get_fbx_uuid_from_key(empty_key), ob_obj.fbx_uuid, None))
It is quite a lengthy document, so it helps to simply have the computer to the searching for you. Hit Ctrl+F and search for elif ob_obj.type ==‘EMPTY’, and it should find the necessary lines immediately. Put a pound symbol (#) before each of those three lines. It should now look like this:
# elif ob_obj.type ==‘EMPTY’ or ob_obj.type ==‘ARMATURE’:
# empty_key =data_empties[ob_obj]
# connections.append((b”OO”, get_fbx_uuid_from_key(empty_key), ob_obj.fbx_uuid, None))
Save the file and restart Blender. Blender will no longer add a new root bone by itself. Remember, if you get a new version of Blender or upgrade your current version, you will most likely have to do this again!
結論
Now you’re an armature-using master! Get out there and show Blender you mean business!
